Adding Content with Page Builder
Page Builder tool has been customized for the JumboPress theme. It is a powerful and flexible tool that can be used to create pages and posts that allow you to organize content inside widgets on a layout using a grid system with rows and columns. This tool allows you to be more specific on how the responsive theme rearranges itself when the page or post is viewed on different sized screens.
Important: You can only use either Visual Editor or Page Builder. Once you switch to Page Builder you cannot switch back to Visual Editor without losing content.
Page Builder Tool Overview
The video below features a few resources that will help get started on using this layout tool.
Note: Only watch the video a until minute 2:50 for all the pertinent information for our customized Page Builder tool. JumboPress does not support custom row and widget styles or the Prebuilt Page Builder functionality
Page Builder Interface
To use the new Page Builder tool, click on the ‘Page Builder’ tab on the top right corner of the WYSIWYG, which will be replaced by the following:

Rows & Columns
Page Builder works in the context of rows and columns filled with different types of widgets. Each row is represented by a blue container that can be divided to create columns.
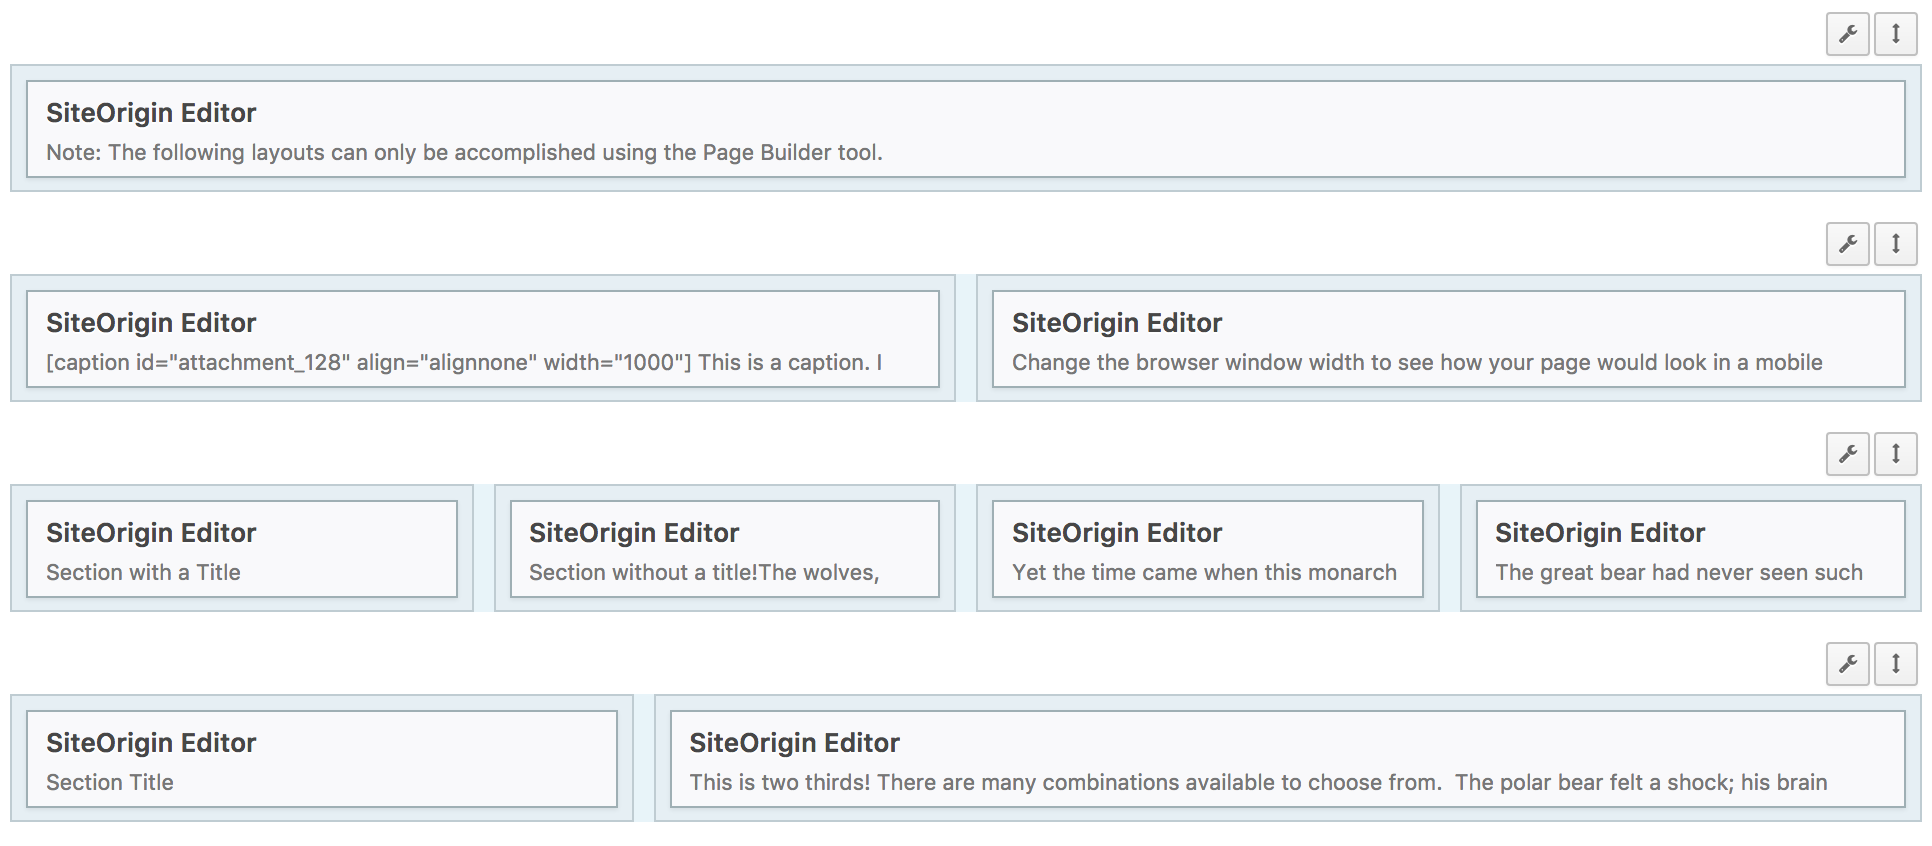
The following is an example of a page built with Page Builder. Note the different rows, columns, and the widgets filling each area.
When adding a row there are many options:
- Columns: This allows you to choose how many columns to add to the row.
- Column Ratio: From the drop down menu you can choose the proportion of space each column will take up on the page. You can get very specific with this. We suggest you keep it at “Even (1)” to avoid problems.
- Ratio alignment: This drop down lets you select where to position the columns, in ratios such as “Thirds (0.33)” in a two column row you can select whether the 25% column lives to the left or to the right of the 75% column.
Widgets in Page Builder
Widgets are a block that performs a specific function such as showing an image or a block of text. Learn more about widgets and their functionality. You can duplicate the widget, any content added to the widget will also duplicate. You can also delete any widgets, just be conscious that any content that the widget contains will also be deleted.
Widgets in the Page Builder do a specific function and ask for various information such as content, or a link for a button, etc. If this is your first time using the Page Builder create a page to play around with each widget and learn what each one does and what information it asks for to do its function.
Creating a New Page/Post Using Page Builder
The process to create a page or post using Page Builder is similar to creating one with Visual Editor except for WYSIWYG.
To create a new page or post using Page Builder:
- Create the page or post
- Click on the ‘Page Builder’ tab on the top right of the WYSIWYG
To add a new row:
- Click on ‘Add Row’
- In the pop-up select how many columns you’d like.
- The default option will divide the row evenly by the number of columns.
- You can adjust the ratio or click on the percentage numbers to type in a specific number, for example: two columns at 25% and 75%.
- More than 4 columns will start to make the content area really small.
- Click ‘Insert’
To edit a row:
- Hover over the crescent wrench at the top right of each row and click ‘Edit’.
To add a widget:
- Click on the container you’d like to add a widget.
- Click on ‘Add Widget’
- Select a widget from the selection to insert
To edit a widget:
- To edit the widget hover over the widget and click on ‘Edit’
- Add the information needed for the widget to function
- Save your work by clicking ‘Save Draft’ or ‘Publish’ or ‘Update’
Important: You can only use either Visual Editor or Page Builder. Once you switch to Page Builder you cannot switch back to Visual Editor without losing content.
Editing an Existing Page/Post Using Page Builder
To move content from the Visual Editor and use Page Builder:
- Click on the ‘Page Builder’ tab
- A pop-up will appear on your screen
- Confirm that you’d like to copy the existing content from the Visual Editor into Page Builder. Any content you create with Page Builder will overwrite the existing content for that page, so we recommend that you copy your content over.
- Page Builder copies all of your content to a SiteOrigin Editor widget in a single column row at a width of 100%. This setup gives you an accurate representation of how your content looked before.
- Start adding the rows and widgets you need to create your desired layout.
- Open the original SiteOrigin Editor widget at the top to access the content from the Visual Editor and copy and paste the content into your new widgets
- Once the page is built, delete the original row from the transfer from the Visual Editor
Important: Once the content is transferred to the Page Builder’s rows and columns you will not be able to revert back to the Visual Editor without losing content used in Page Builder.
Page Builder Responsive Behavior
The Page Builder tool gives you control over how the content is rearranged in differently sized screens. To control this, know that each row can collapse into a single column. The content on the left-most column will be first, and each subsequent column in that row will tuck under that first column. Each row after that will do the same, until all of your content displays in one continuous column.
Our recommendation is to build out your page and then preview your page to play with the width of your browser window, making it skinny and see how you content would be viewed in a smaller screen such as a smart phone.